

Strawberries are one of our absolute favorite plants to grow on our backyard farm. They’re small, beautiful, and produce sweet berries year after year. Over the 15 years we’ve been homesteading, we’ve tried nearly every method of growing strawberries—from rows to planters to raised beds. In general - I prefer growing strawberries in a bed, however for those with limited space, a tower is a great solution.
In this article, we’re sharing everything you need to know, including step-by-step instructions for building and planting a stacked raised bed DIY strawberry planter. We’ve also included supply lists and care tips to help you maximize your strawberry harvest.
This stacked raised strawberry bed is a great way to grow berries in a small space. If you are looking for other ideas for growing strawberries, make sure to check out:
Growing Strawberries Vertically: Ideas for how to Skyrocket Your Harvest
How to Make an Easy DIY Vertical Strawberry Tower with PVC or Wood
The Best Way to Grow Strawberries: A Comprehensive Guide for Home Gardeners
Benefits of a Stacked Raised Bed Strawberry Planter
There are many ways to grow strawberries, and vertical gardening offers some great advantages. Even when we grow strawberries in raised beds, we also like to plant some in flower beds or on the patio in vertical planters. Here are some key benefits of growing strawberries in stacked raised beds:
Space Optimization: Vertical planters maximize space, ideal for small areas like patios or balconies.
Improved Air Circulation: Better airflow reduces fungal diseases and keeps plants dry.
Easy Access: Vertical beds make planting, watering, and harvesting easier, especially for those with mobility issues.
Enhanced Drainage: Elevated beds ensure excess water drains away, though they may need extra watering.
Visual Appeal: Vertical planters create a beautiful display with cascading foliage and berries.
Pest & Weed Control: Height keeps pests away and reduces weed growth.
Extended Growing Season: More sun exposure can promote quicker growth and earlier fruiting.
Creative Design: Customize vertical beds to fit your space and garden style.
See the Best Strawberry Planters for growing strawberries in containers.

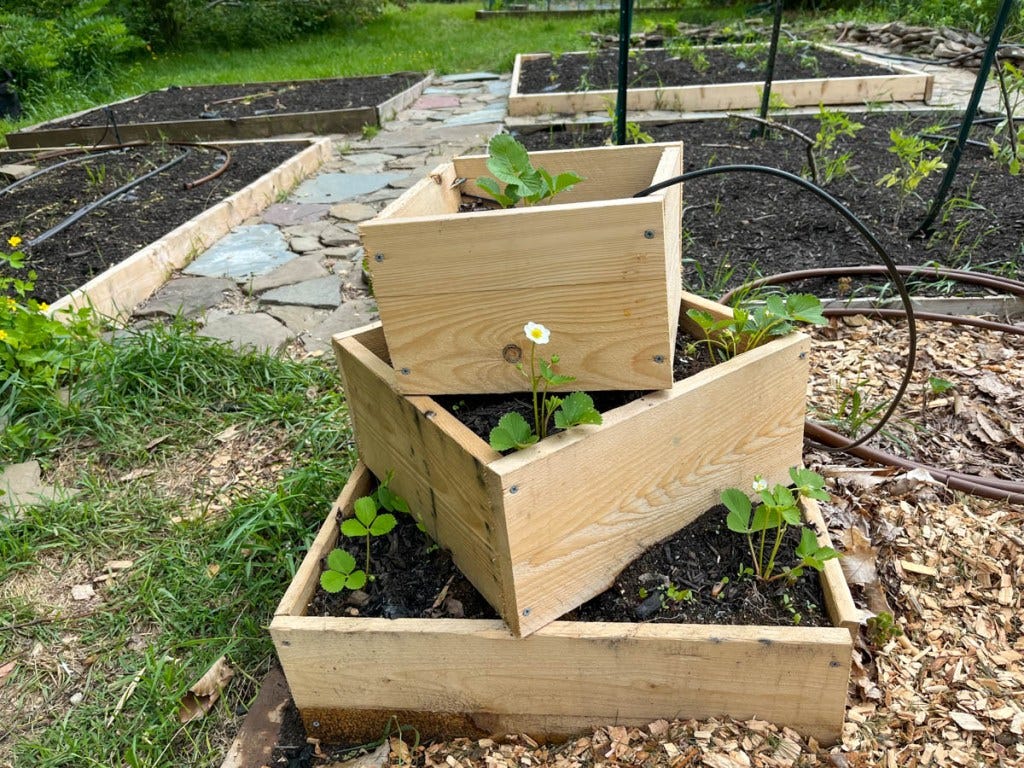
A Few Details about this Stacked Raised Bed DIY Strawberry Planter
Building our stacked DIY strawberry planter was quick and simple. The design features three square tiers stacked on top of each other, though I’ve seen other designs with rectangular beds or different tier arrangements. This method worked well for us, but you can always add an extra tier if you'd like a larger planter (I suggest adding a bottom tier).
Materials and Tools Needed
Here’s a list of materials for the DIY stacked raised bed strawberry planter, with some helpful details about specific items:
Wood: Choose weather-resistant wood like cedar to prevent rotting (avoid treated wood). The width of the boards will determine the height of your planter. Here are the lengths you'll need to cut:
2 boards – 24 inches
2 boards – 22 7/8 inches
2 boards – 17 inches
2 boards – 15 7/8 inches
2 boards – 12 inches
2 boards – 10 7/8 inches
Exterior Wood Screws: At least 24 screws long enough to go through your boards (1-inch screws work well if your wood is ½ inch thick).
Exterior Wood Glue
Potting Soil: I mixed potting soil with compost for a rich, well-drained mix.
Strawberry Plants: 9 plants
Tools:
Saw: A circular saw works, but any available saw will do.
Drill: Use a drill with a bit slightly smaller than your screws.
Shovel
We sourced the wood from our local lumberyard, and since we already had the other tools and supplies, this project was not only simple to build but also affordable. The most expensive part was the cedar wood.
Step-by-Step Instructions for Building a Stacked Raised Bed Strawberry Planter
Step 1: Cut the Wood to Size
Start by cutting your wood to the required lengths. I used a circular saw, but any saw will do. After cutting, lightly sand the edges and any rough spots.
Step 2: Assemble the Raised Bed Squares
Drill holes in the ends of the longer boards for each square (2-3 holes, depending on the board width). Apply wood glue along the edges and screw the boards together. Stack the longer boards over the ends of the shorter boards to form 3 squares.
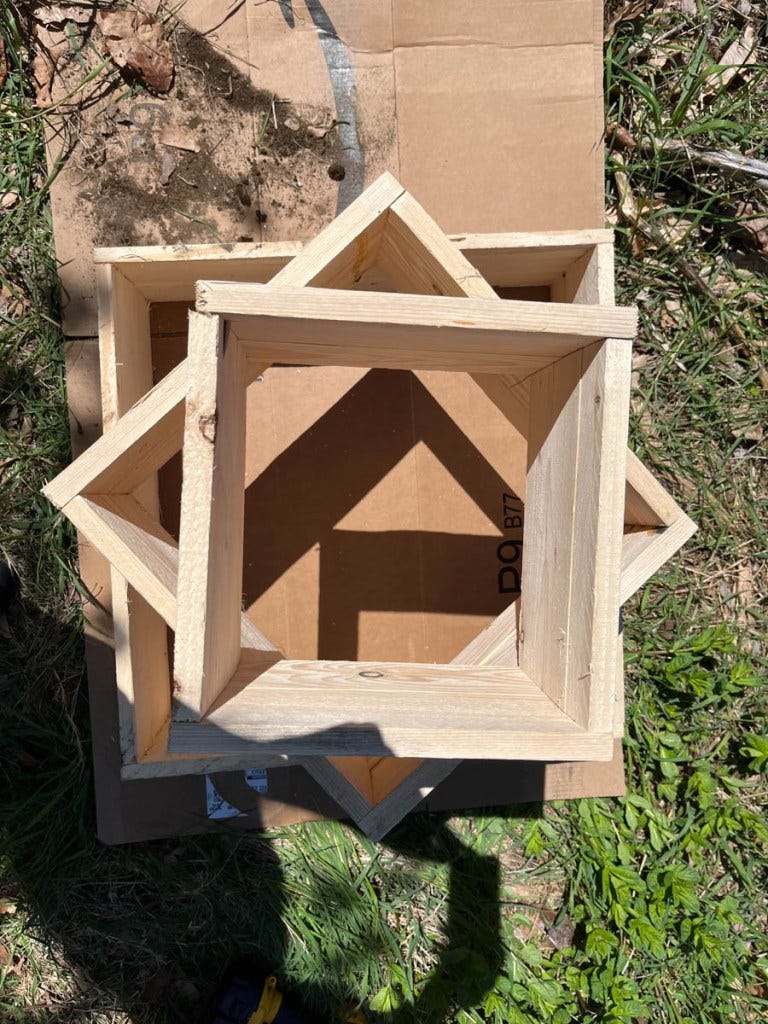
Step 3: Stack the Raised Beds
Stack the three squares, alternating their direction for stability. To secure them, drill a small hole where the beds meet, insert a small nail (cut to size), and hammer it in.
Step 4: Position the Planter and Fill It
Place the planter in a sunny spot. If you’re planting on a weedy surface, cover it with weed cloth or cardboard first. Fill the planter with a soil mix of potting soil, compost, and topsoil. Tap the soil down and water thoroughly. Let it settle for a few days before planting.
Step 5: Plant the Strawberries
Plant 1 strawberry in each space. For potted plants, place them at the same level as the pot’s soil. For bare-root strawberries, spread the roots out.

Selecting, Planting, and Caring for Your Strawberries
Choosing Strawberry Varieties:
Opt for compact or trailing varieties like ‘Alpine,’ ‘Tristar,’ or ‘Mara des Bois’ for vertical planters.
Soil Preparation:
Mix equal parts potting soil, compost, and perlite for good drainage. Ensure the planter has drainage holes or a layer of gravel at the bottom.
Watering and Irrigation:
Keep the soil moist but not soggy. Use a drip system or soaker hose to water directly at the roots.
Fertilization:
Feed your plants with a balanced organic fertilizer in spring and again after the first harvest. You can also add some compost to the planter each year for better berries.
Weed and Pest Control:
Use mulch to suppress weeds and keep the soil moist. Protect your strawberries with barriers like netting to keep pests at bay.
Regular Maintenance:
Prune runners, remove damaged leaves, and check the planter for stability. Keep an eye out for pests or diseases and act promptly if needed.
Harvesting and Enjoying Your Strawberries
Once your strawberries turn bright red, they’re ready for harvest! Gently pull the berry off the stem. For the best flavor, eat them right away or store them in the fridge (unwashed and with the tops on). If you have extras, freeze them for later use or make jams or jelly.
Enjoy your strawberries fresh, in smoothies, or in desserts like strawberry shortcake or pies.
Happy Homesteading,
Gretchen